A resolution of 1024x768 or higher is advised.
Thank you, common type of warning from 1998.
|
    
   
Please Read:
Rules for the use of services at pcrpg.org
|
| Pioneer CLD-D406 Laserdisc Player U1 Error Repair |
Pioneer laserdisc players sometimes present with a "U1" error message as they get older. This problem is not specific to the CLD-D406, so if you have a similar model this guide will most likely apply to your equipment as well. The cause of this seems to usually be a rubber feed motor belt wearing out due to either defect or more likely due to age. When the belt loses elasticity, becomes loose, or breaks entirely, you might observe that the player can't reliably eject or retract its tray. The player might also eject the CD tray even when you instruct it to eject the LD tray, often accompanied by a long delay and sometimes grinding noises. You might also observe a failure of the unit to successfully spin up the disc even if it does manage to fully retract the tray. You might additionally hear strange grinding noises. If so, the cause is almost certainly the feed belt.
The good news is that this problem is very easy to remedy. Before you begin, you will need the proper replacement belt. These belts are not unique to Pioneer laserdisc players but are commonly used in a variety of home theater equipment such as VHS decks and DVD/BD players. The belt normally suggested for this repair is a generic SCQ-4.0 belt. This stands for square cut size code Q with 4.0 inch circumference. In repairing my own Pioneer CLD-D406 player I found that while an SCQ-4.0 belt restored function to the unit, it was not fully reliable. I switched it for an SCA-4.0 belt. Size code A is simply the next step thicker with Q being 0.057 inches thick and A being 0.068 inches thick. The cost of either belt is about five dollars at MCM Electronics as of 2015, and they can easily be ordered online.
I believe those paragraphs about cover the how and why of the problem as well as its repair, so without further delay let's move onto the annotated picture guide. Being that this is the glorious future we live in and I have a decent camera, my intention is to provide large and clear images that should help you get your repair under way. Some steps are not pictured because they are either easy or because I was lazy (mostly this). Full disclosure.
DISCLAIMER:
YOU MUST ASSUME FULL RESPONSIBILITY FOR ANY DIRECT OR INDIRECT DAMAGES CAUSED BY FOLLOWING THIS GUIDE
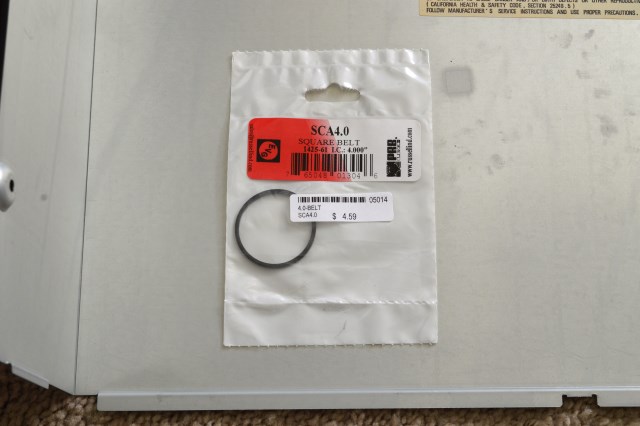
SCA-4.0 Belt
The first step is to disconnect power and remove the disc tray. If your player will eject its tray at least partially, go ahead and do so before unplugging the unit. Simply unplug the power cord once the tray is out as far as it will go and before it tries to abort and retract. If your player ejects its tray fully, this should be even easier--simply let it do so and then unplug it. If your player will not eject the tray at all or instead pops out the CD tray even when you press the LD eject button, you will need to fully eject the tray manually. Sadly in this last case, the feed motor will not help you in any way so go ahead and unplug the unit with the tray still inside. Note that the tray locks into place when fully inserted, so you will need to figure out how to unlock it before it will want to move outward. I did not have to do this step and did not investigate the process for doing so because I am lazy.
Before you can complete tray removal, the top cover will need to be removed. Make sure the power is disconnected. There are seven easily-located screws to remove in order for the top cover to come off. Three are small zinc plated ones on the back flange of the top cover and two are medium black-painted ones which can be found on each side.

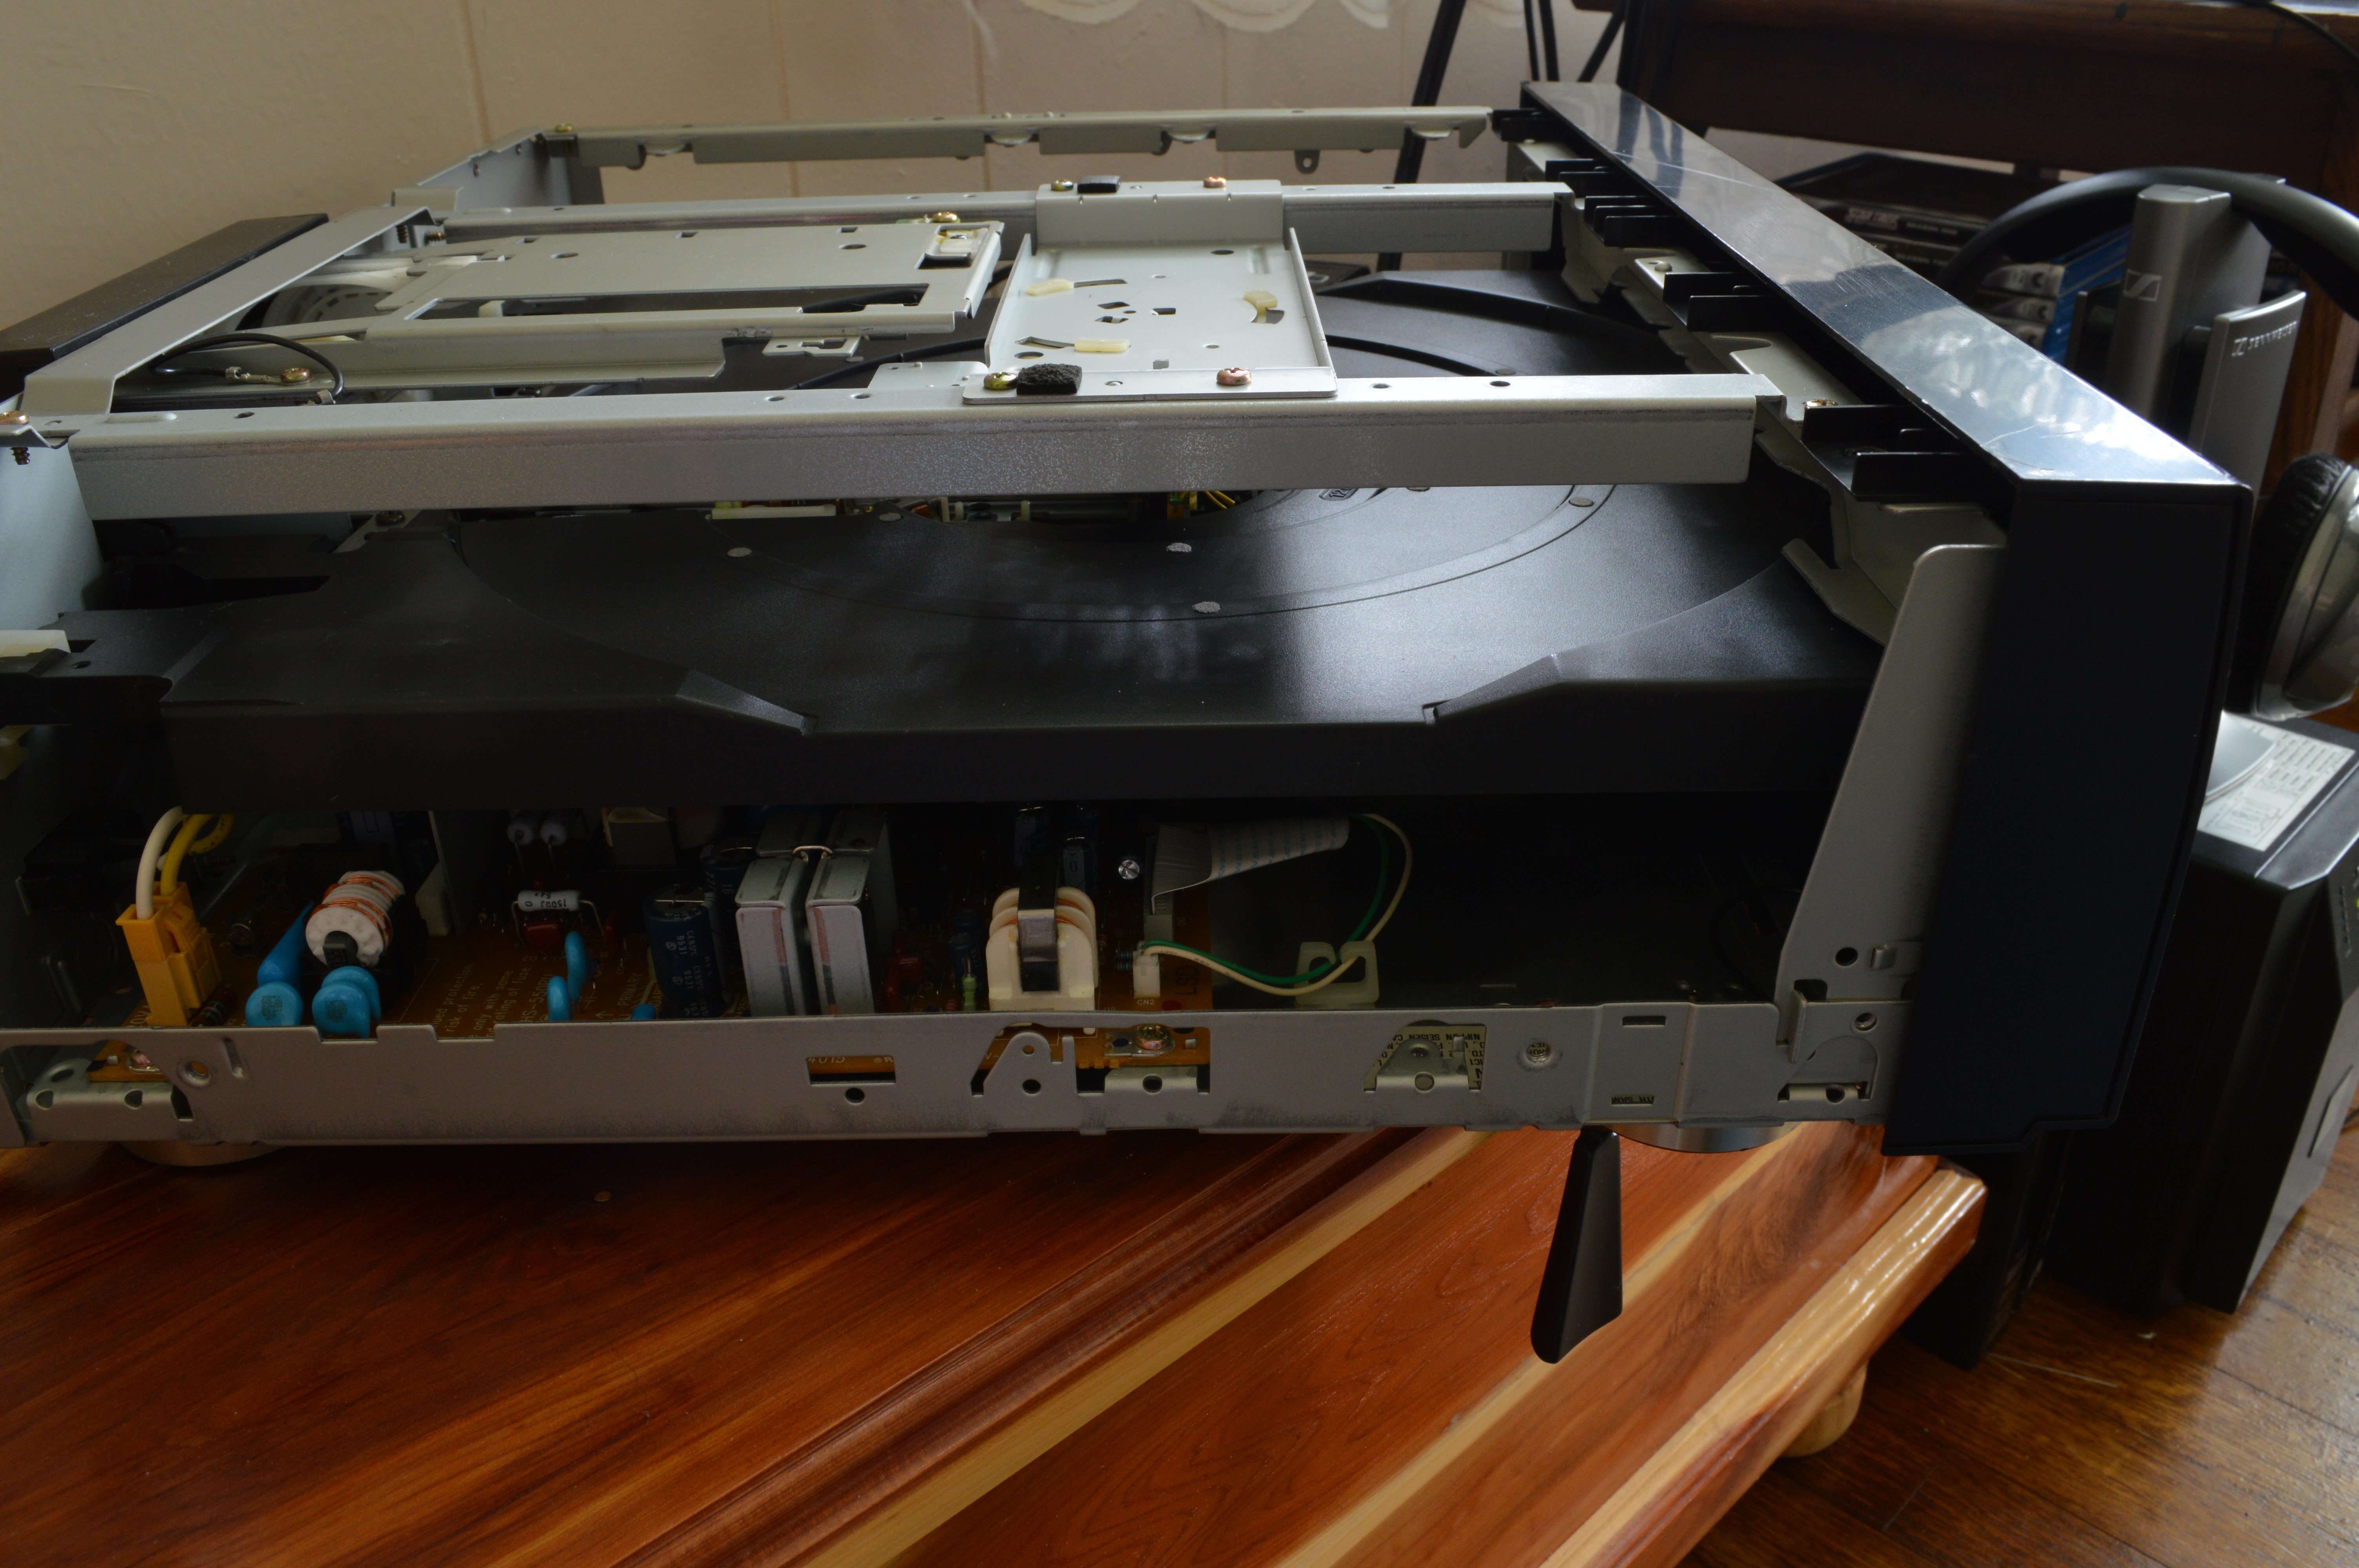
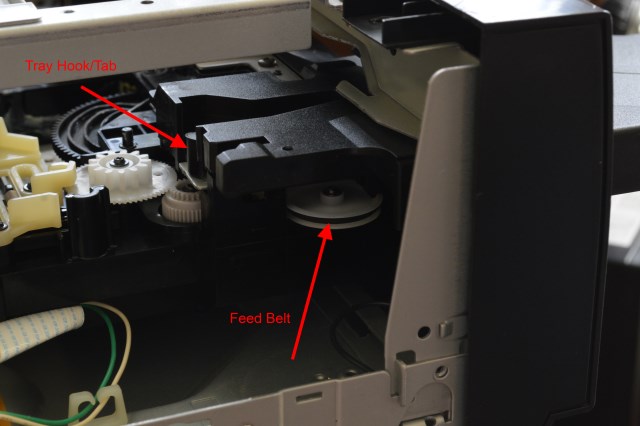
Side View of Laserdisc Player Without Top Cover, Tray Fully Inserted
Side View of Laserdisc Player Without Top Cover, Tray Fully Extended
Once the top cover has been removed, pull the tray out through the front of the unit. To do this, you must locate two tabs on the tray and press them inward toward each other. Doing so will allow you to unhook the tray from the tray slide. You may need to move the tray ever so slightly backward into the unit before you will be able to unhook the tabs if your tray has been fully extended. Unhooking the tray will let you continue to pull it out completely through the front of the unit.
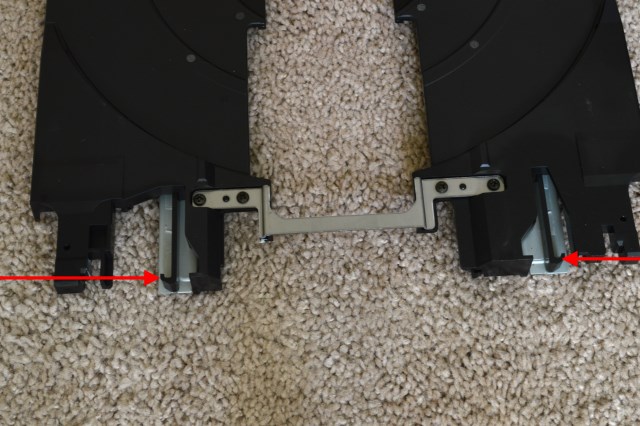
Laserdisc Player Tray With Tabs Indicated
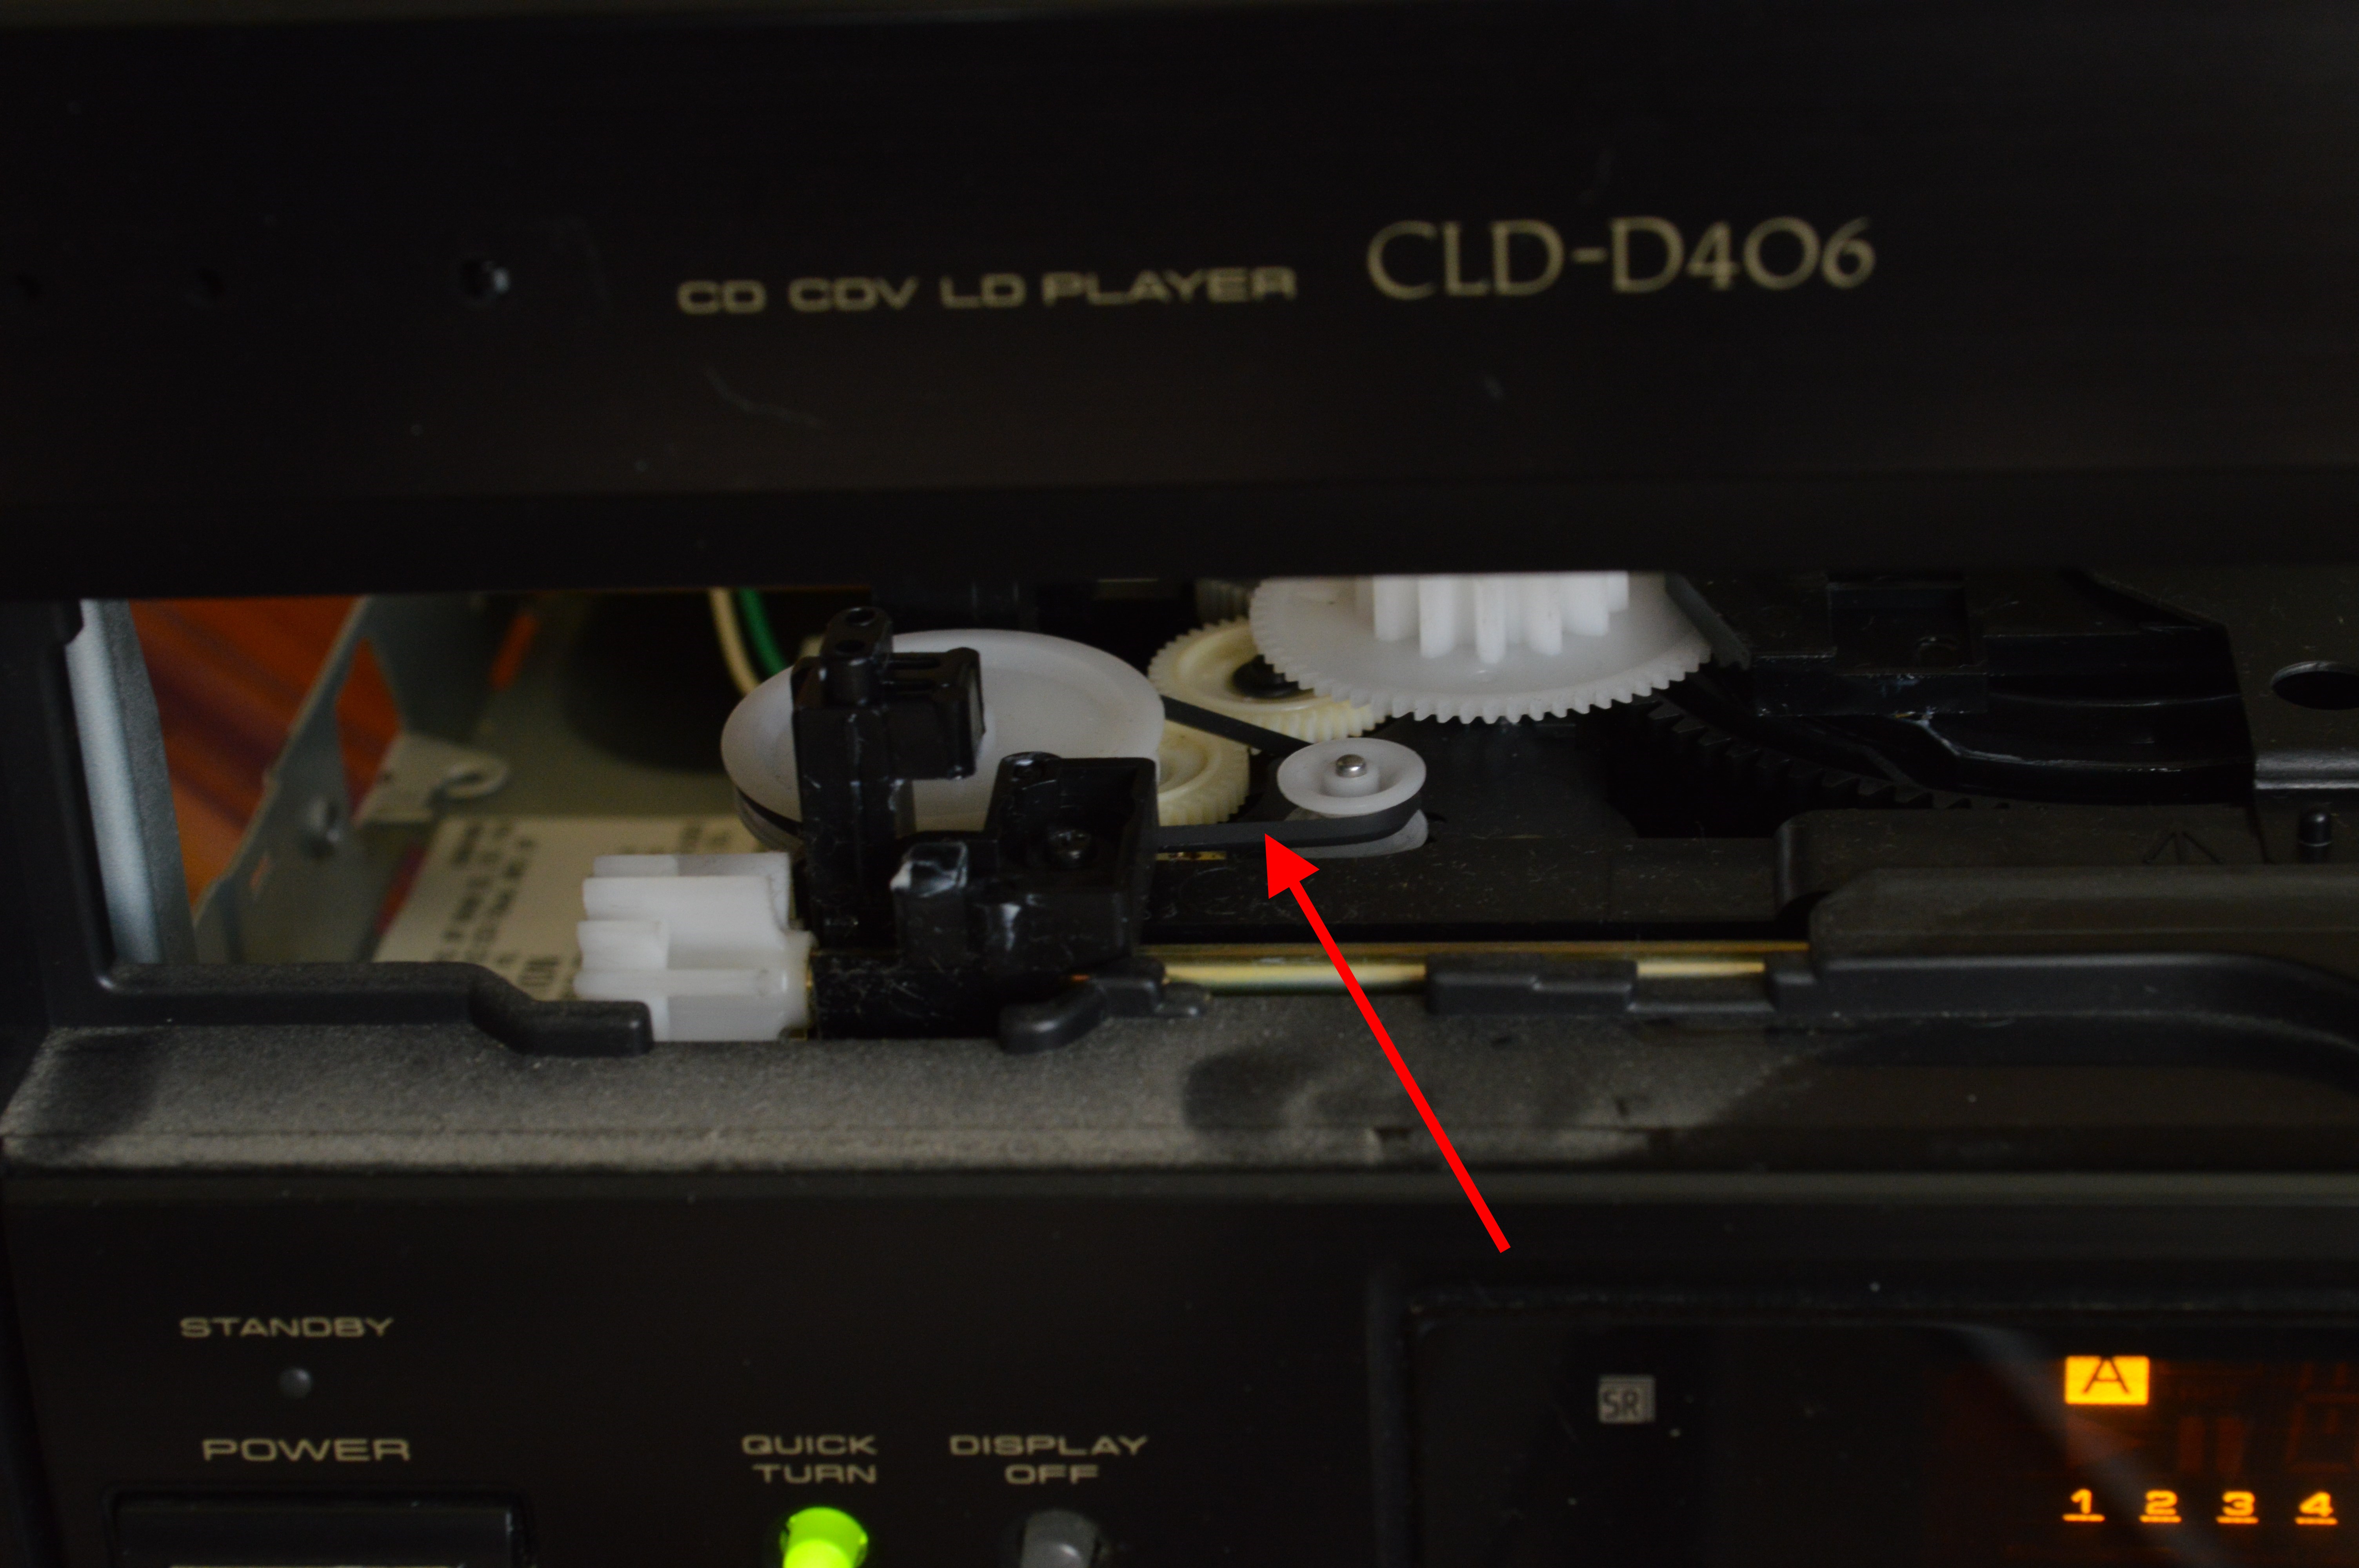
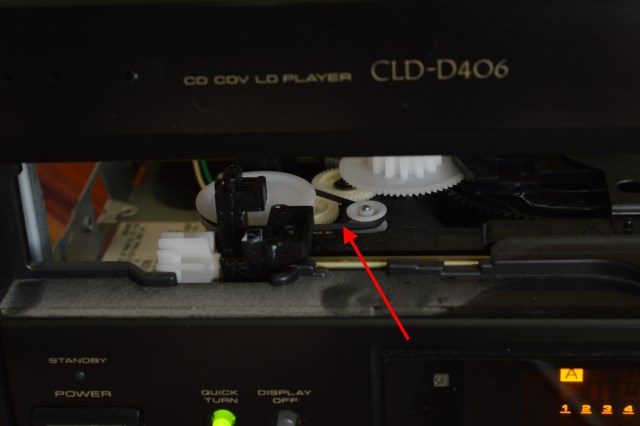
At this point with the tray removed, replacement of the belt is simple. Grab the old belt with your fingers or pliers if you have difficulty fitting your hands into the space available. The belt should easily stretch over the edge of either of the two pulleys. Pulling the belt over the small pulley will probably be easier than the large one.
Once the old belt has been removed, install the new belt by looping it around the large pulley and then stretching it over the edge of the small pulley. Try not to use pliers for this step as you might knick the belt. Take care to not introduce any extra twist into the belt. When correctly installed, the geometry of the two pulleys should introduce one quarter-turn of twist--this is normal. The belt does not provide much tension. This is normal and not necessarily indicative of a bad or incorrectly sized belt.
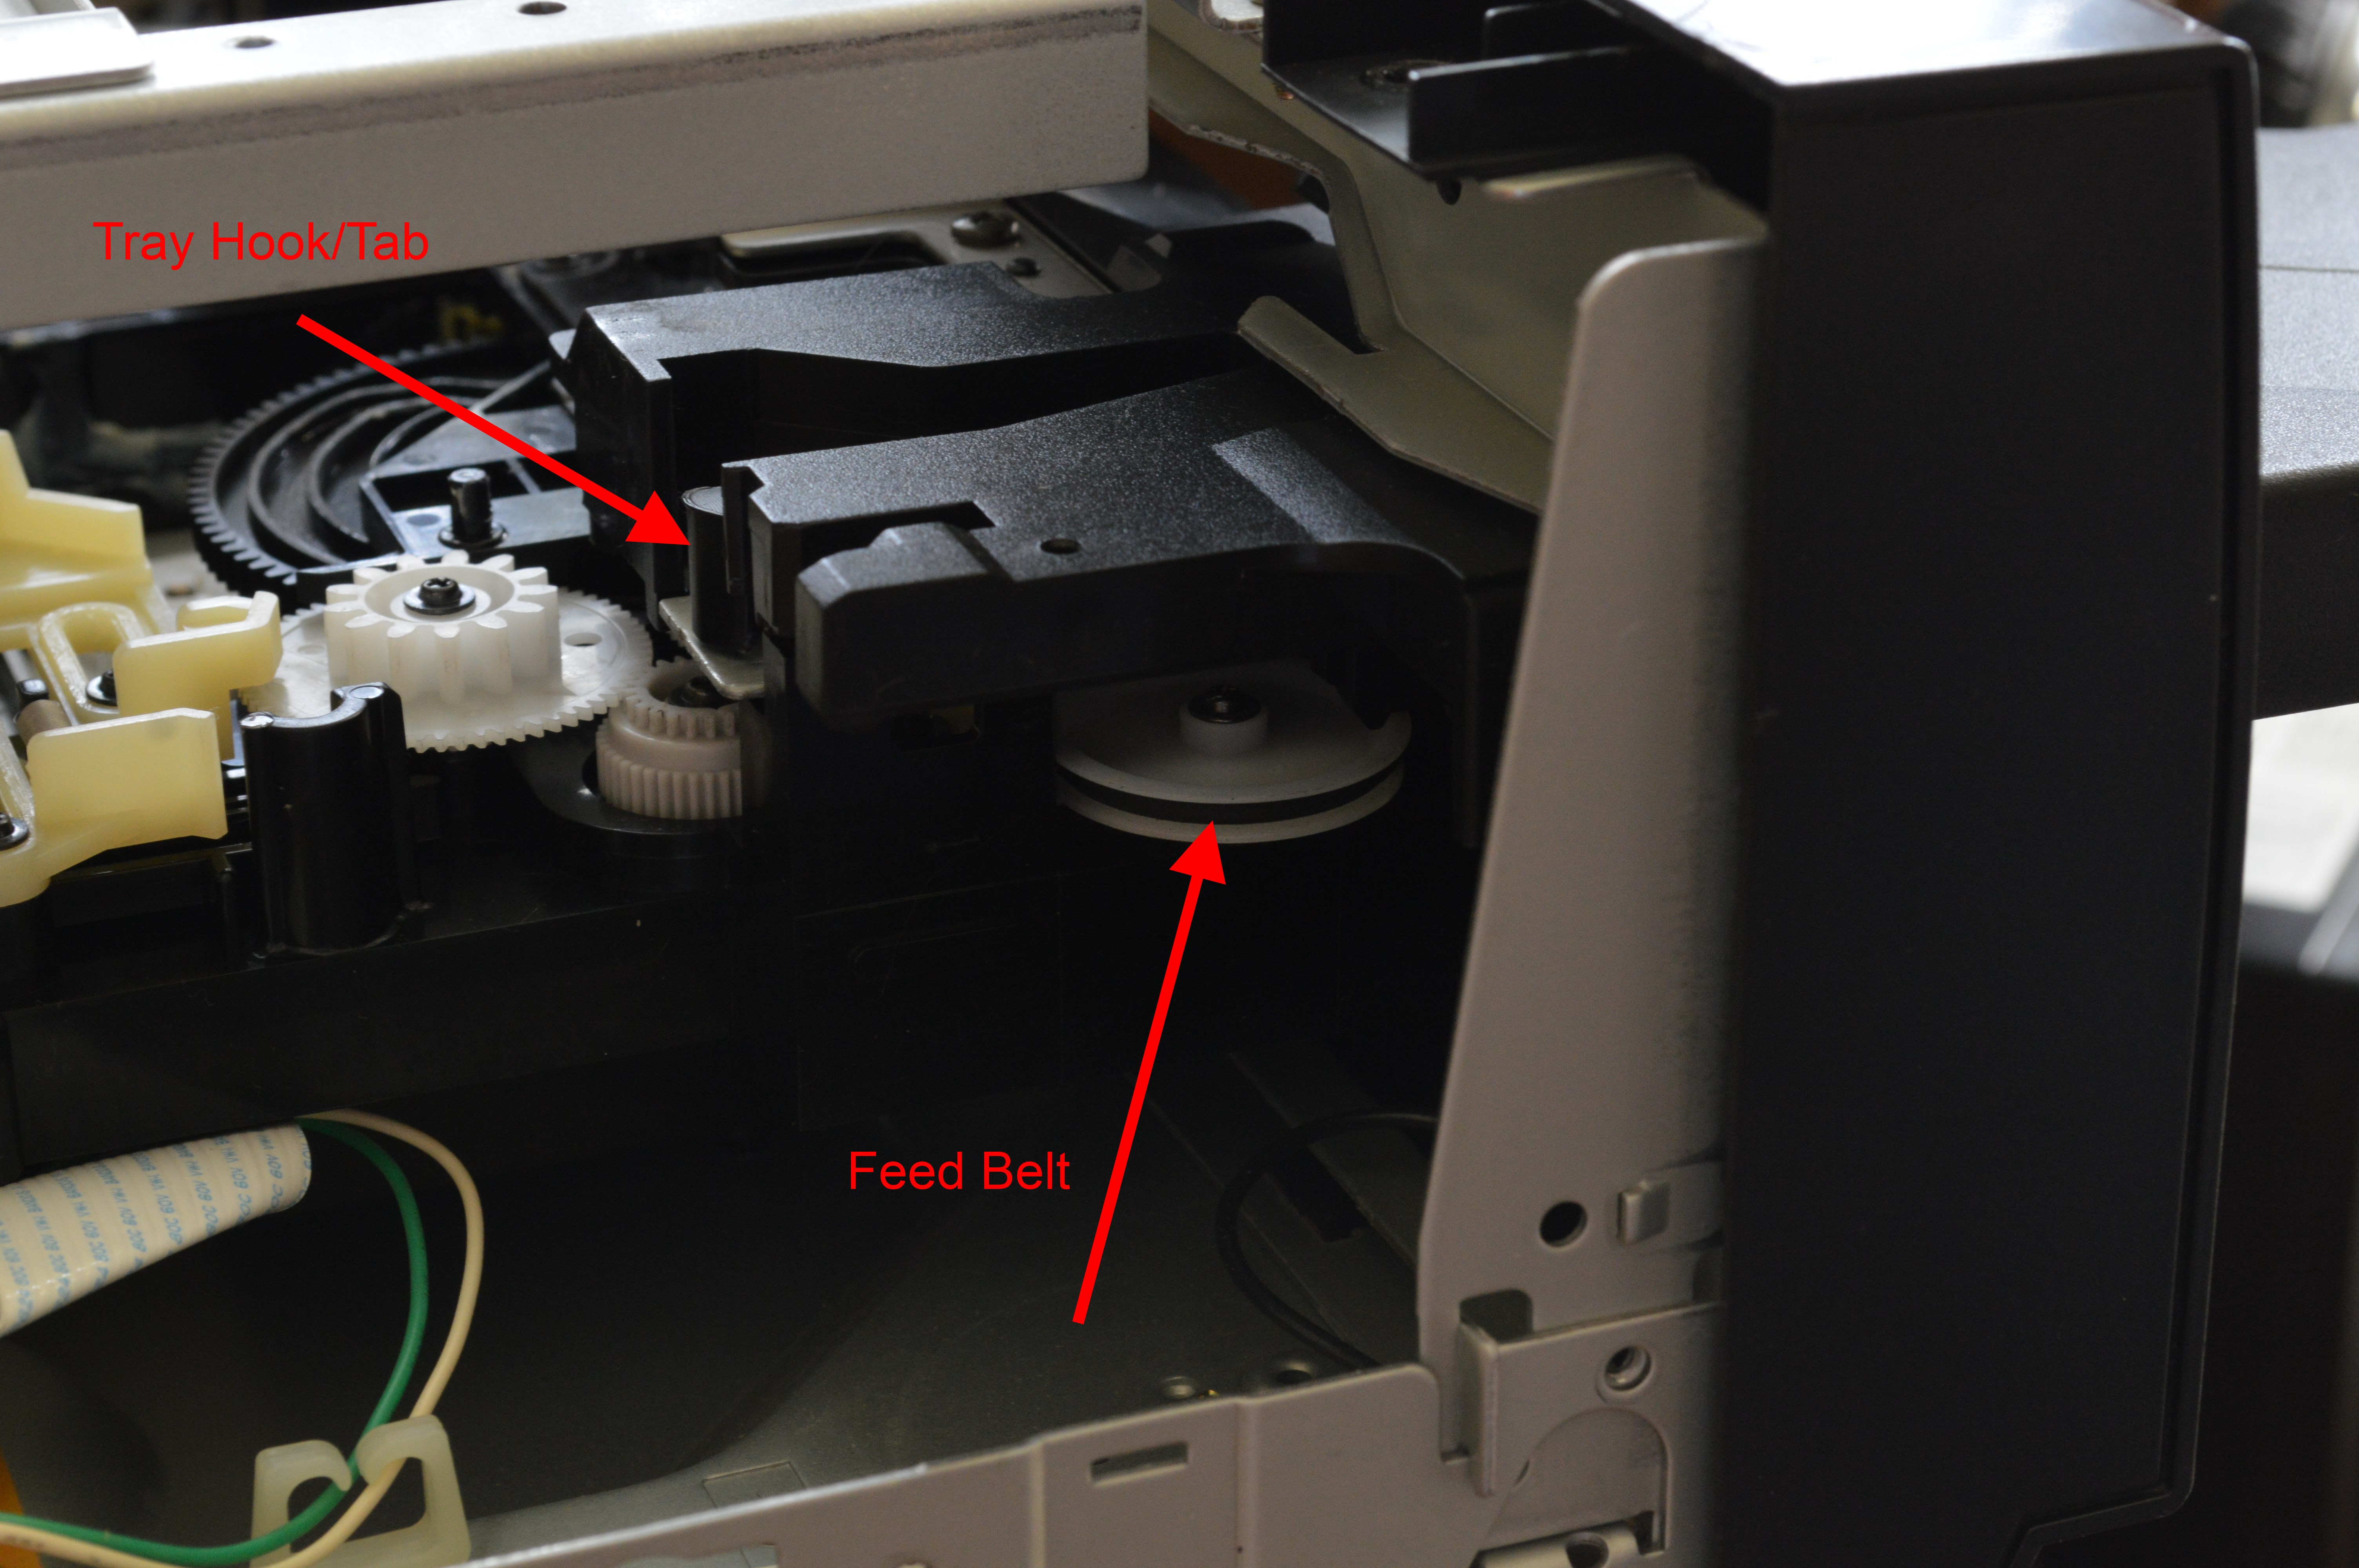
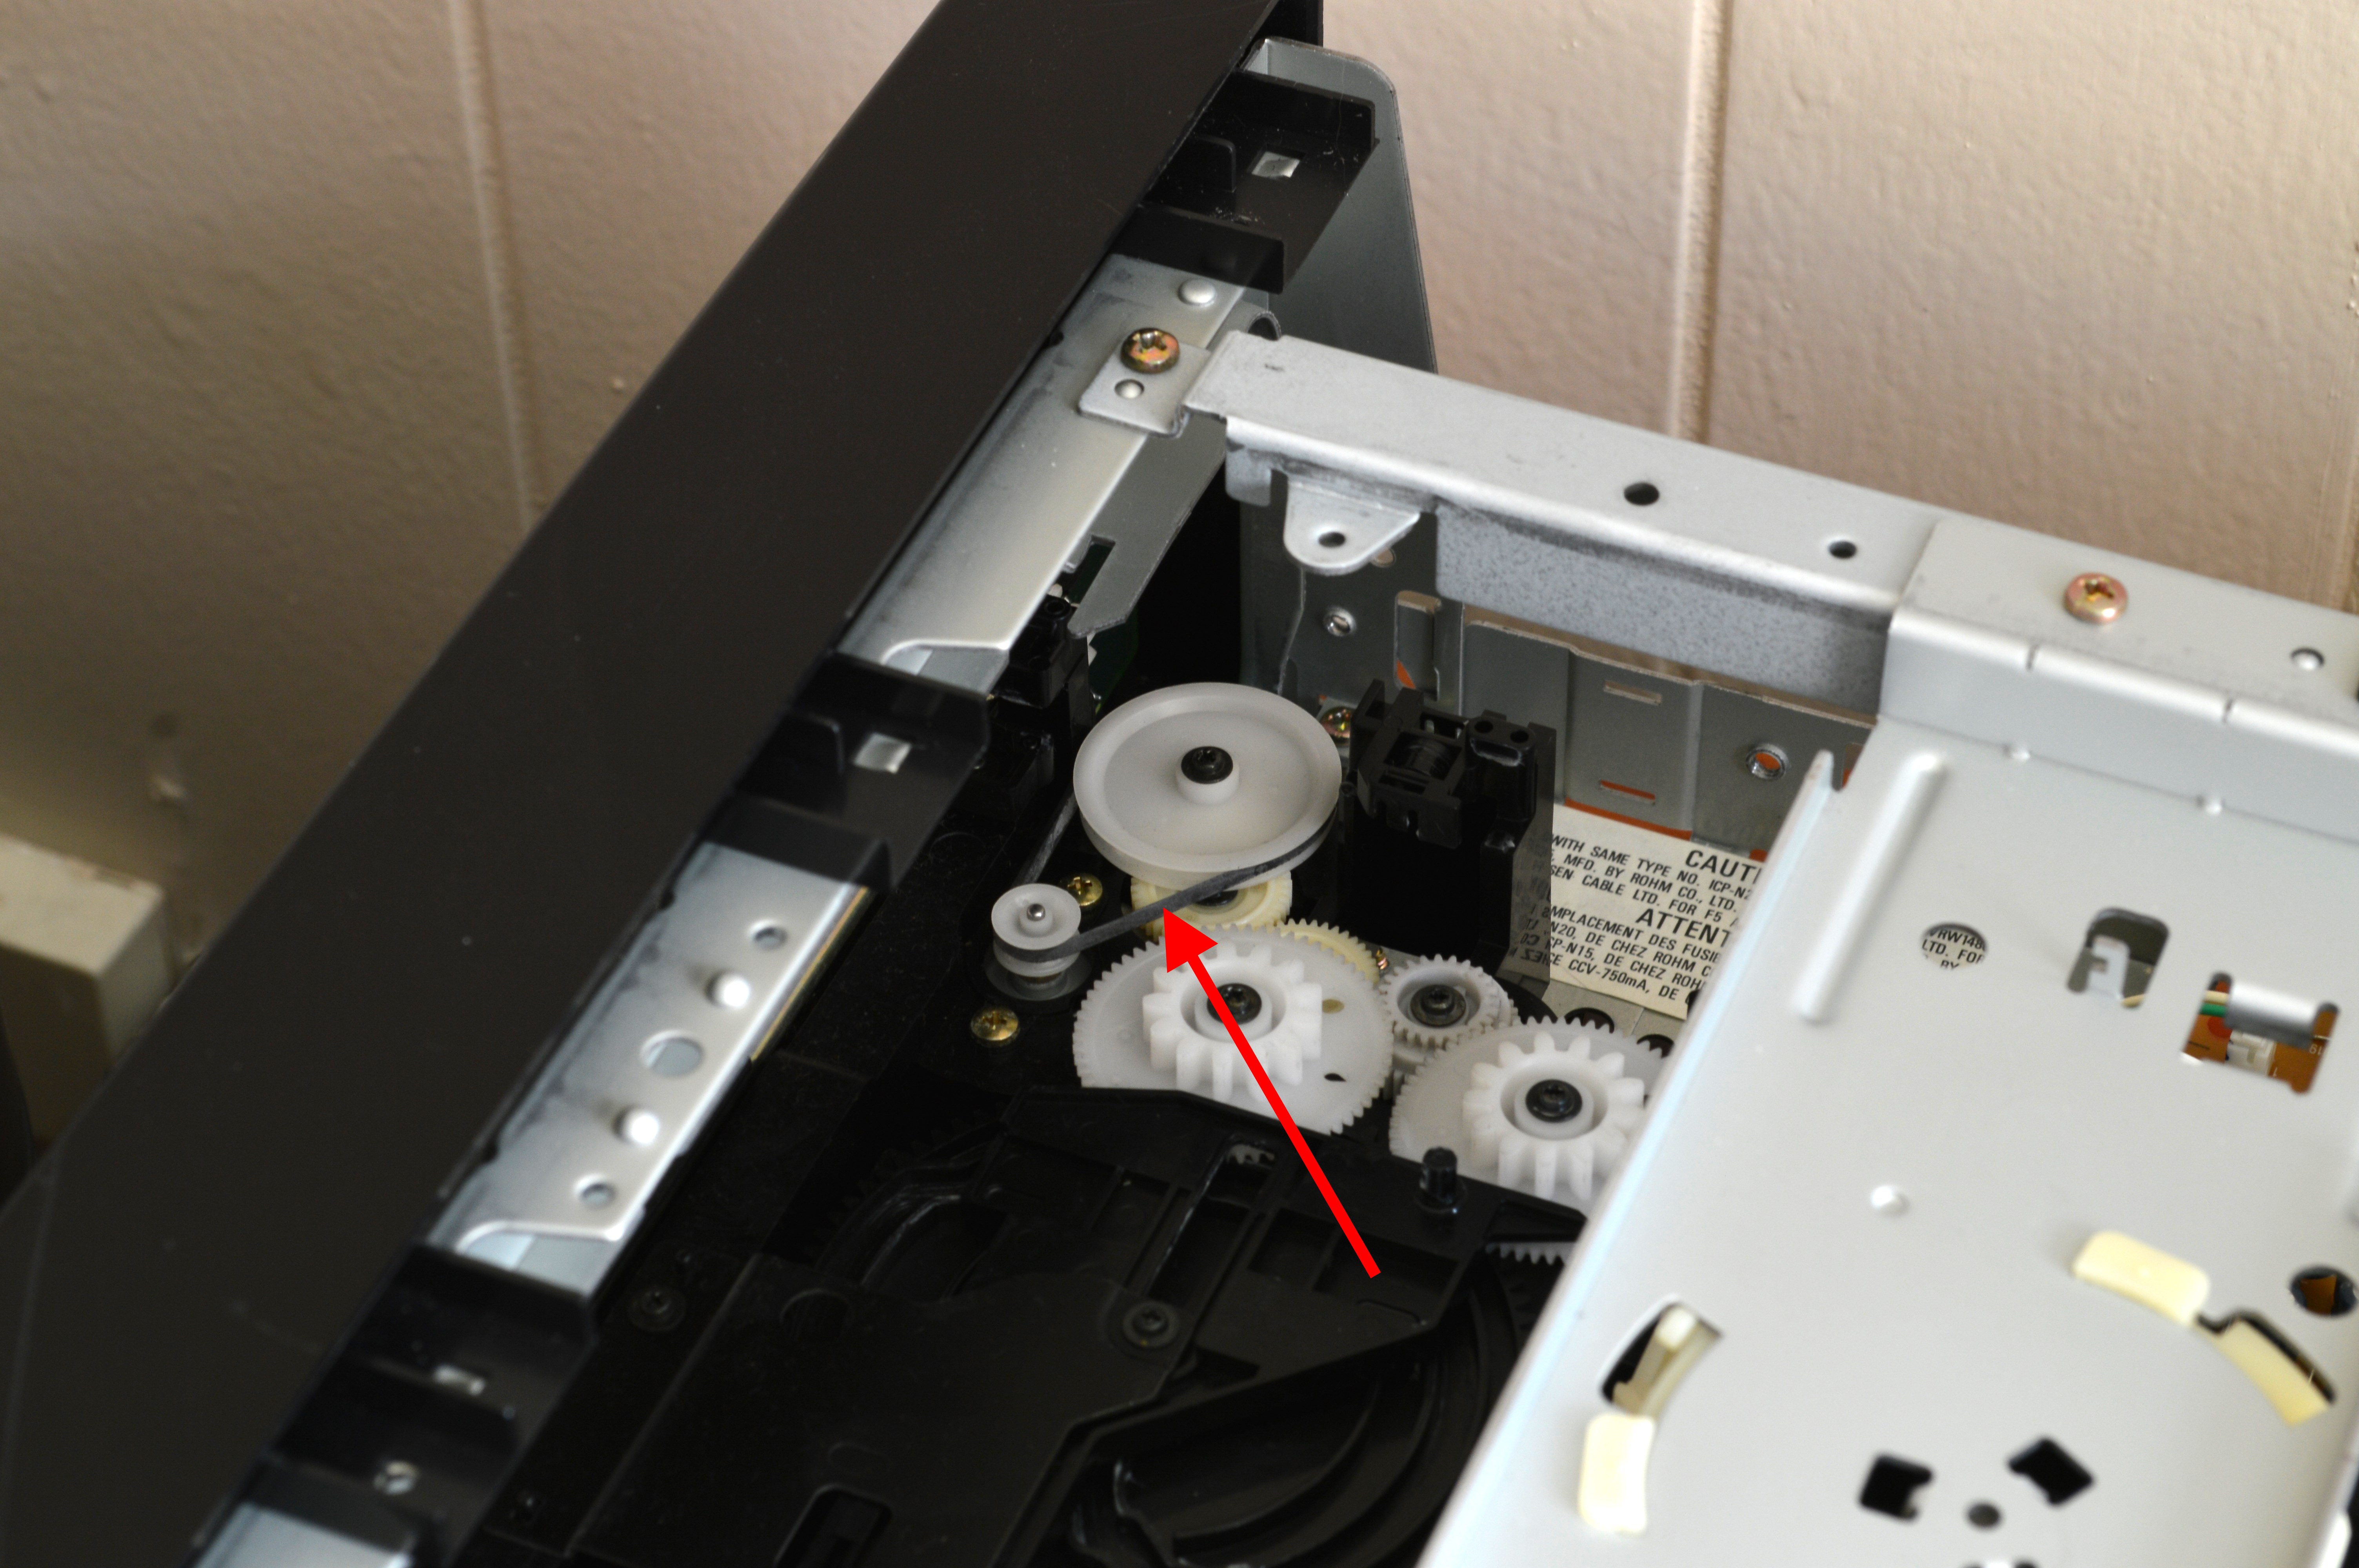
Feed Belt Assembly From Front With Tray Removed

Feed Belt Assembly From Above With Tray Removed
With the belt replaced simply reinstall the tray, reattach the top cover, and plug the unit back in. The tray should be re-inserted all the way to the back of the unit until it locks into place before you turn the player on. If your tray does not want to fully feed in, remove the tray and check the alignment of your tray with respect to the tray guides inside the player while re-inserting it. You may also need to slightly adjust one of the white sprockets if you accidentally turned one after removing your tray.
|

|
|
Hits for this page (Since 5/30/2015): 11,568
Other places you need to visit:
www.clanorb.com
NOTICE: This page is written in overly-complicated PHP.
Document rendered in 0.002 seconds. |